 EVERY CROCHET
 Home Decor 10 rounds No account, no download
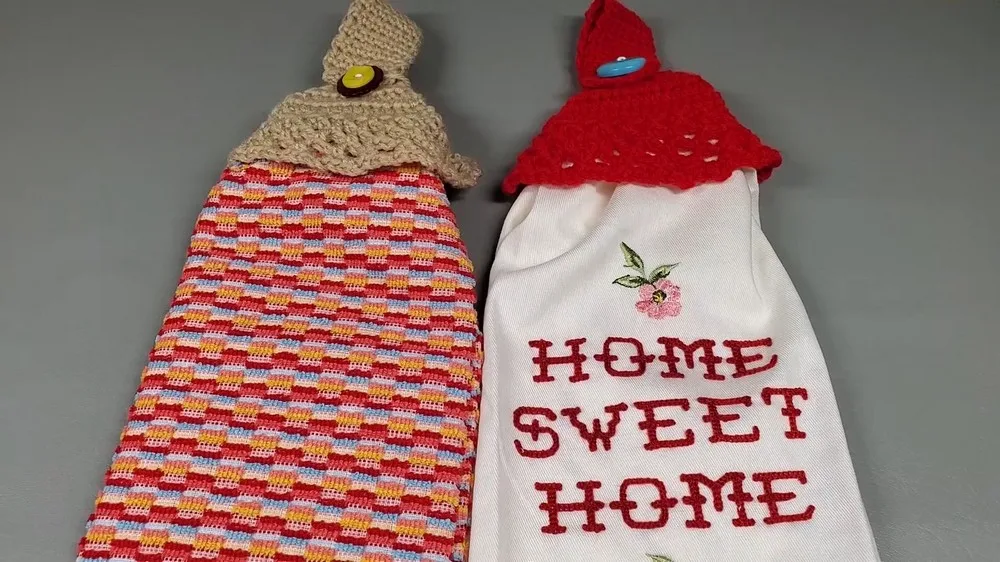
Buttoned kitchen towel topper with a lace-look edge
A single crochet (UK: double crochet) towel topper with a buttonhole closure; US and UK stitch terms both given.
- Skill
- Beginner
- Time
- 3-4 hours
- Yarn weight
- Worsted
- Hook
- 5 mm

Beginner
What the original write-up called it. Nothing here is graded again.

Worsted
What the sample was worked in. Any weight works; the size moves with it.

3-4 hours
What the original page reckoned. Your own pace is the one that matters.
About this pattern
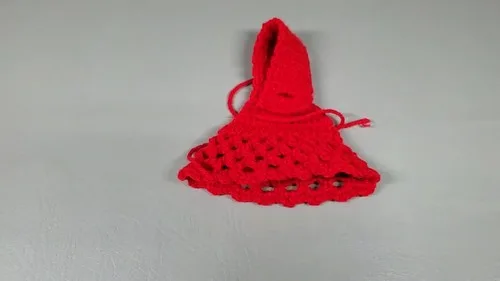
This is a flat, buttoned crochet panel that loops over a kitchen towel and hangs it from an oven or rail handle. It starts from a chain-8 foundation, uses single crochet (UK: double crochet) for the buttonhole and body, finishes with four half double crochet (UK: half treble crochet) increase rows, then adds a chained loop finished with a half double crochet and chain-3 openwork border. It needs a 5 mm hook, worsted-weight yarn, a 1¼ inch button, and basic stitch counting across roughly thirty rows.
This towel topper is built almost entirely in single crochet (UK: double crochet), the firmest and most fabric-like of the basic stitches, which is what gives the finished rectangle enough body to hang without sagging. A small buttonhole is worked partway up using a chain-3 space, and the top is shaped with a short run of half double crochet (UK: half treble crochet) rows to taper the piece before it meets the button loop.
Materials
- Kitchen towel
- Yarn (example used is Red Heart Super Saver)
- 5 mm crochet hook
- 1 and ¼ inch button
- Needle and thread (or crochet thread)
- Scissors
- Stitch marker (optional)
- Scratch paper and pen (to keep track of rows)
The list is the pattern's own wording.
Instructions
Every round is printed as the pattern wrote it, brackets and all. Open the key beside a round to see only the short forms that round uses.
Towel Topper Base
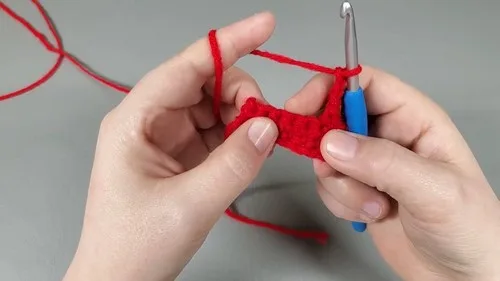
Start with a slip knot on your hook and chain 8.
- (7)Row 1
Single crochet in the second chain from the hook and in each chain across (7 single crochets total).
- (7)Row 2
Chain 1 and turn, single crochet across for row 2.
Creating the Buttonhole
- Row 3
Chain 1 and turn, single crochet into the first two stitches, chain 3 (skip next 3 stitches for buttonhole), single crochet in the last two stitches.
- (7)Row 4
Chain 1 and turn, single in the first two stitches, 3 single crochets around the chain 3 space, single in the last two stitches, bringing you back to 7 single crochets.
Expansion Section
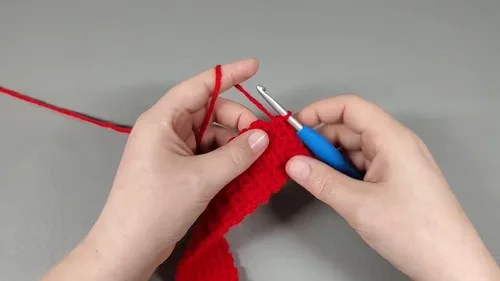
- (7)Rows 5–30
Chain 1 and turn, single crochet across. Repeat this for a smooth rectangle segment.Begin Increasing for the Topper's Upper Part:
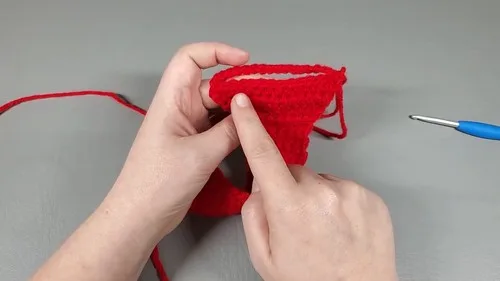
- Row 31
Chain 1 and turn, work two half double crochets in the first stitch (beginning of increase), half double crochet in each stitch across until the last stitch, work two half double crochets in the last stitch.
- Rows 32–34
Repeat the increasing pattern: for rows 32, 33, and 34, ensuring increases occur in the first and last stitches of each row.
Creating the Loop
- Loop
After completing your increases, chain 17 (or a length suitable for your towel loop), join with a slip stitch to form a loop.
Border and Finishing
- Border
Work half double crochets around the edge of the loop and the main part of the topper for a neat finish, incorporating increases as needed to keep the work flat.
- Edging
Use the chain 3 and skip method to create an openwork border along the edge.Finish by attaching the button opposite the loop, ensuring it fits through the buttonhole created earlier.
Making up
- Step 1Weave in all ends securely.
- Step 2Sew the button at the base of the topper, positioning it to align with the buttonhole for easy hanging.
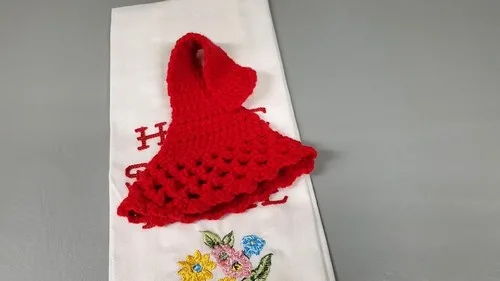
- Step 3Attach the topper to your towel by folding the towel's top edge into the loop and securing it with the button.
Notes from the pattern
- A 5 mm hook is specified throughout; sizing up or down will change the finished width away from the intended 7-stitch base.
- A stitch marker is optional but useful for flagging the buttonhole row and the start of the increase section, since both change the stitch pattern from what came before.
- Because rows 5 to 30 repeat identically, keeping tension even across that long straight run matters more than in the shorter buttonhole and increase sections, where variation is less visible.
- Scratch paper for tracking rows is worth using here specifically, since the pattern runs to 34 rows plus a loop and border, with no built-in row markers other than the buttonhole and increase transitions.
The essentials
- Rounds
- 10
- Parts
- 5
- Level
- Beginner
- Time
- 3-4 hours
- Hook
- 5 mm
- Yarn
- Worsted
Stitches you will use
- Foundation chain and single crochet base Rows 1-2 set the 7-stitch width from a chain of 8; miscounting the turning chain here throws off every row that follows.
- Chain-space buttonhole Row 3 skips 3 stitches to open the buttonhole, and row 4 works 3 single crochets back into that chain-3 space to restore the count to 7; skipping too few or too many stitches changes how the button sits.
- Paired edge increases in half double crochet Rows 31-34 place two half double crochets in the first and last stitch of every row; forgetting one side flattens the taper meant to shape the topper's upper section.
Troubleshooting
The button slips loosely through the
The chain-3 space is larger than the 1¼ inch button needs; work the buttonhole chain slightly shorter or take a smaller bite from row 4's 3 single crochets around it.
The top edge of the topper looks
One of the increase rows (31-34) likely skipped an increase at one end; check that every row in that section has two half double crochets at both the first and last stitch.
The long straight body doesn't sit flat and puckers slightly
Tension has drifted across the repeated rows 5-30; work a few practice rows first if gauge feels uneven, and keep the same hook grip throughout that section.
Substituting yarn
- Cotton, worsted weight
- Gives crisper stitch definition and a sturdier feel suited to kitchen use, though cotton has less give, so the buttonhole may need to be worked a touch looser.
- Acrylic, bulky weight
- Creates a chunkier, quicker-worked topper with fewer rows needed to reach the same length; move up to a 6-6.5 mm hook and use a slightly larger button to match the thicker fabric.
Washing and care
- Worked in an acrylic yarn such as the Super Saver named in the materials, the finished topper is machine washable on a gentle cycle and can be tumble dried on low heat without risk of shrinking or felting.
- Reshape the panel while still slightly damp to keep the rectangle square and the increase rows sitting flat, then lay it flat to finish drying and store folded rather than hung to avoid stretching the buttonhole.
The photographs taken while this was being made
Every one was taken by whoever published the pattern, in the order the source listed them.
FAQs
Questions
Can this pattern be made with a different hook size?
The 5 mm hook is chosen to match worsted-weight yarn and produce a 7-stitch base of a specific width. A different hook will change that width, so any adjustment should be tested with a small swatch before starting the full 34 rows.
What if a stitch marker isn't available?
The marker is optional; scratch paper and a pen are enough to track progress through the buttonhole row, the long straight section, and the increase rows. A scrap of contrasting yarn tied at row 3 or row 31 works just as well.
How is the buttonhole size adjusted for a bigger or smaller button?
The buttonhole is formed by chaining 3 and skipping 3 stitches on row 3. Chaining one fewer or one more stitch, and adjusting the skip to match, will tighten or loosen the opening for a different button size.
Does the long repeated section need to be exactly 26 rows?
Rows 5 through 30 build the main rectangle and can be shortened or lengthened to suit a particular towel, since they simply repeat single crochet across. Any change to that count should be made before starting the row 31 increases, so the finished length still suits the towel it will hang.
These answers came from whoever first published the pattern, kept word for word.